Pages

Thursday, September 27, 2012

Applesauce

I've been making and canning applesauce now for about nine years. I really like having it during the winter months. And since I got the Back to Basics Strainer, I can get a lot done in a relatively small amount of time!
Start with soaking your apples for a few minutes in a vinegar/water bath, then rinsing them. This will help to kill any bacteria and remove some of the sprays that the farmers put on the apples during growing.


Next, put like two inches of water in a very large pot. The pots that I have pictured here are 16qts and 22qts. Both of these together use a bushel of apples. You can do smaller batches if you dont have a pot this size. Let the water begin to heat while you cut your apples. 
Quarter all your apples. 
Place your cut apples in the boiling water in your pot. 
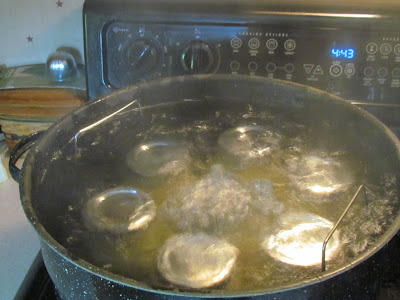
Let the apples cook covered on med/high. Stir ever once in a while and make sure there is enough water to keep the from sticking to the bottom and burning. If you have a pot with a think bottom, and you keep it covered most of the time, sticking should not be a problem. If they begin to stick, you can add a little more water and turn the burner down a little. You just dont want to add too much water because you dont want your applesauce to be really runny. Also, while your apples are cooking this is a good time to sterilize you jars. There are many ways to do this, but I like to run mine through the dishwasher.
Cook until the apples are soft enough that you can easily push a fork through them. For me this takes about 30minutes, but time varies depending on the apple, the temperature, and the size of your pot.  
 Set up your machine.
Using a cup or a measuring cup transfers from the pot, begin to run through strainer (while you are doing this you may want to fill your Water Bath Canner half way up with water so that it can begin to get warm).
Whala....Applesauce!
Gather your jars, and lids, and rings. My Water Bath Canner holds 7. 
Bring your lids to a slight boil to sterilize. Do not boil tho.   
Ladle hot applesauce into hot jars leaving 1/4 inch headspace. Remove any air bubbles. 
Wipe around rim with a clean damp cloth to remove anything that would keep it from having a tight seal.

Place lids on the jars and them screw the ring bands on semi tightly.
Place jars into canner. water should cover the jars by 1 inch. (Caution: the water in the pot should not be hotter than the jars them self when you go to put them in otherwise the jar may break.) If the water is too hot...take some out and replace it with cool water until the desired temperature is reached.
Cover and bring canner to a boil. Start timing at the boiling point. Process quarts and pints for 20 minutes. 
When time is up...take out of water and leave on counter for 24 hours to cool. Check all the lids AFTER the 24 hours rest time to make sure that lids have sealed properly before storing (if your lid pops up when you touch it in the middle it did NOT seal right and should be put in the refrigerator and used soon). 

 Note: since this is my first time posting something on canning I've included a few canning sites below that you can check out for some more tips and info on it. :)

Simply Canning

Pick Your Own / Applesauce


Dehydrated Apples


Last year my mom started buying dried apples for a quick healthy snack. The pro: they were delicious! The con: they are a bit on the expensive side. So this year I decided to buy seconds apples (apples that didn't meet the grade so you can buy them cheaper and cut out the small imperfections) from my local farmer. Making dried apples is surprisingly easy. Here are the instructions for how I did it. The dehydrated I use is an Excalibur . I've used other dehydrators before, but this is by far my favorite!! Also, you can peel and slice your apples by hand by I really liked using Pampered Chefs Apple Peeler. So lets begin....


First gather all your apples. To fill all the screens of the Excalibur it took me around 25 - 30 medium apples. I chose to use Gloden Delicious apples because they are really sweet...but you can play around with the varieties. 

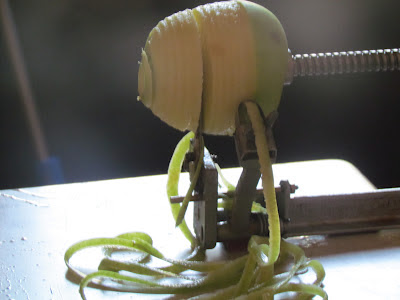
Next, place your apple on the corer/peeler. You wanta make sure your apple core is centered on the prongs. Note: If you are doing this by hand you'll want to peel the apple, core it, and then slice it very thinly.

The peeler will core, peel and slice the apple for you. 
Next make sure you cut off any bad spots and make one cut from the top to the bottom of the apple so the sliced fall apart instead of sticking together.

Next add 1/4 cup lemon juice of 1 quart of water.
Place apples in and coat with lemon water. You only need to leave them in the lemon water a few second. Then take them out the let them drain while you continue with peeling and cutting the rest of your apples. 
 
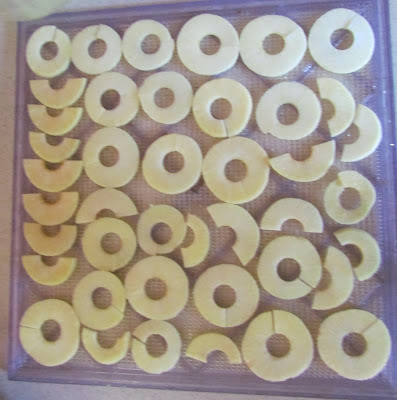
Arrange neatly on your screens.  They can touch each other a little because they will shrink a lot as they dry.
Once all your screens are full, then place the lid on the dehydrator. Put the temperature on  135 degrees and let dehydrate for 7-9 hours depending on how dry you like your apples. If you are using a dehydrator when you stack the screens and the motor is at the bottom, you may need to rotate your screens for even drying. In my dehydrator, they have been ready after 8 hours.
This is what they look like when they are finished. They will be pliable. 
Store in a cool place in an air tight container...or my favorite...a glass jar!!


Saturday, September 15, 2012

French Bread


This is the best French Bread Recipe I've EVER tried. And I've tried quite a few. Plus, it's super easy, you just need to allow time for rising...

INGREDIENTS:

   2 ¼ c. warm water
   2 T. sugar
   1 Tbsp yeast
   1 Tbsp salt
   2 Tbsp oil
   5 ½ -6 cups flour-stirred before measured

DIRECTIONS:

Preheat over to 375 degrees
Dissolve sugar and yeast in the warm water. Let this proof—or sit for a few minutes until it bubbles.
Add salt, oil and 3 cups of flour and beat well.

 Add in 2 1/2 -3 more cups of flour. The dough should clean off the sides of the bowl and not be too stick – but be careful not to add too much flour. Knead for a few minutes.
Leave the dough in the mixer to rest for 10 minutes and then stir it down (turn on your mixer for 10 seconds) and then allow to rest another 10 minutes. Repeat for a total of 5 times.
Turn dough onto a floured surface and divide into two equal parts. Roll each part into a 9×13 rectangle. Roll dough up, starting from long edge of loaf to seal. 

 Arrange seam side down on large baking sheet that’s been sprinkled with corn meal, allowing room for both loaves. Repeat with second part of dough. 


With a sharp knife, cut 3 gashes at an angle on the top of each. 

Cover lightly; allow to rise 30 minutes. Brush entire surface with egg wash (one egg beaten slightly with 1 Tbsp of water). If desired, sprinkle with sesame seeds. Bake for 30 minutes at 375 degrees. Note: I do not brush mine with egg. I brush it with water. I also put a pan of ice on the bottom shelf of my oven while the bread of cooking. This give it a more crust outside while keeping the inside light and moist.


Pie Crust


 Makes 4 single 8inch crusts (pictured above) or you can also use to make the top and bottom of 2 enclosed 8inch pies.


INGREDIENTS:

   3 cups flour
   1 1/4 cup shortening (I use Spectrum Naturals Organic Shortening)
   1 tsp. salt (I like to use sea salt)
   2 Tab. apple cider vinegar
   4 Tab. cold water
   1 egg

DIRECTIONS:
      Mix flour and salt together

   Cut in shortening until well blended

 Beat the egg, water, and vinegar together and add to your flour mixture. Stir until all the flour is absorbed into the liquid. If your dough is still a little too dry, you can add a little more water. 
 
 Stir into a ball and place in a lightly floured surface
 Divide into 4 balls and place one of the balls on wax paper. Place another piece of wax paper on the top
and roll it with a rolling pin until it's a little bigger than the size of your pie pan.
 Remove the top layer of wax paper. Place the dough (it wax paper side up) on top of your greased pie pan.
Peel the top layer of was paper off and press the dough down into the pie pan
 Remove any crust the overhangs the pan by a lot. Roll the rest of the overhanging crust towards the edge of the pan and pinch together.
Finish the crust by pressing against the edges of the pie crust with your finger tips or with a fork.
Fill with pumpkin pie filling, or any kind of fruit filling and top with a crumble. Bake according to directions for filling.